
To setup Heysender in wordpress you will need to install an SMTP plugin, and configure some DNS settings on your hosting platform. In this guide we will use “WP mail SMTP” by WPForms. You can find the plugin on the following link: WP-Mail-SMTP and we will use Simply.com as the example of the hosting product where the DNS settings are done.
With SMTP setup on wordpress your WooCommerce solution automatically uses this.
Install and configure the WordPress SMTP plugin
When the plugin is installed, click on the WP Mail SMTP plugin and you will be send to the settings section.
Now start by setting the From Email field to the email address you wish to send from

Now set the From name field, this is the name shown as sender to the recipient

Now scroll to the Mailer section, and select Other SMTP

In the settings below start by setting SMTP Host to smtp.heysender.com

Under Encryption select TLS

Under SMTP Port input 25

Authentication is set to On per default, just leave it on
Under SMTP Username and Password, set the credentials shown under the STMP user that matches your domain on your Heysender account.
Please note that the password is only shown under the user when the user is created. If you did not save the password, you can generate a new one. But keep in mind that if you have used the SMTP user anywhere else, the password will need to updated here as well.
If you have not created an SMTP user yet, you can read the following guide for further instructions: https://support.heysender.com/configuring-smtp-users

Now click the Save settings button
Configuring DNS settings
Now we need to define your SPF and DKIM on your hosting platform.
In your hosting platforms admin panel you now need to navigate to the DNS section. You should see something like the image below

In the image there are 2 files circled with red. These files hold our SPF and DKIM. Should either not exist you need to create the one missing.
SPF record
If you do not have any SPF record setup, create a TXT file and set the following value:v=spf1 include:send.heysender.com ~all
If you already have an existing SPF record, you need to add “include:send.heysender.com” to the value before the end signature (eg: “-all” “~all” )
Example: v=spf1 include:spf.protection.outlook.com include:send.heysender.com ~all
Multiple values needs to be separated with a space
DKIM file
The value for DKIM is found in the Heysender backend and is unique to each domain. Log into Heysender and navigate to Domains and select the domain in question.
You are now shown the SPF and DKIM values that needs to be added to your hosting service

Please note that changes to DNS settings can take up to 48 hours before working. However it usually is a matter of minutes.
How to test?
So how do you test whether your setup is working?
Start by looking at your Heysender account. Under the domain in the DNS tab you can see Expected value and Current value if these match you will get a green checkmark on the right hand side, this means that the DNS settings are done correctly. Next go to your wordpress backend and navigate to the tools section under the WP Mail SMTP plugin. Here you will find an Email test option. Simply input the email address you wish to send the test email too and click Send Email
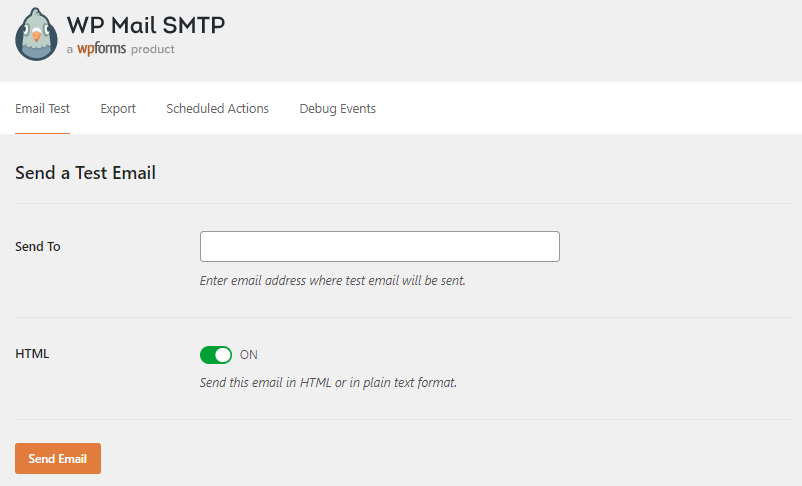
You should now have sent an email to the entered email address. Also on your Heysender account you now have an entry in your Log overview
